
TLDR:
You can add HVAC line set covers after the system is installed and commissioned. Start by checking the existing piping and insulation, measuring the full route, and choosing a cover that fits the entire insulated bundle without compression. Mount the base carefully, keep service points accessible, and seal exposed penetrations where needed. PVC systems such as Slimduct SD work well for many residential applications, while heavier commercial jobs may call for Slimduct PD or metal options such as Slimduct RD.
An exposed line set does not mean you missed your chance to add a cover.
In many residential and light commercial projects, HVAC line set covers can be added after the equipment is already installed and running. In fact, most two-piece cover systems work well for retrofit applications because the base mounts behind the existing lines and the cover fits over them.
Post-installation work does require a slightly different plan. Because the refrigerant lines, insulation, drain tubing, and communication cable already have a fixed route, the cover needs to fit around those conditions instead of trying to rearrange them.
Before you start cutting channels, check the system, map the full route, measure the complete insulated bundle, and figure out which fittings you’ll need. A little planning at the start makes the rest of the job much easier.
Why Timing Matters: When to Install Line Set Covers
Before covering anything, make sure the HVAC system has been commissioned and checked.
Pressure testing, evacuation, leak checking, charging, and system operation should be completed before the refrigerant piping is covered. If something needs attention, you don’t want to remove a newly installed cover only to have to go back to it.
Line set covers can be added after an HVAC system has already been installed and commissioned. Most modern two-piece systems let you place an existing insulated line set into the base without opening or disturbing the refrigerant circuit.
There isn’t a set rule saying you have to leave the system exposed for several days or weeks. Once commissioning is complete and the line set has been checked, the cover can generally go on.
Take weather conditions into account, though. If the insulation got wet during installation, rain, or other site work, let it dry before enclosing it.
This is also a good time for one last inspection. Look for torn insulation, separated seams, damaged drain tubing, tight bends, or anything else that’s easier to correct while the line set is still fully exposed.
Measure the Whole Bundle, Not Just the Copper
Good line set cover sizing and measurement start with the installed system.
Measure the complete path between the indoor and outdoor equipment. Include straight horizontal and vertical runs, wall entries, offsets, corners, and any areas where the piping changes direction.
Then look at what the cover has to fit around.
A mini split line set cover may need space for both insulated refrigerant lines, a drain hose, and permitted control wiring. Measuring only the copper diameter can leave you with a channel that looks large enough on paper but won’t close comfortably once the actual bundle goes inside.
Measure the bundle at its widest point and leave enough room for the insulation to keep its shape.
Inaba Denko’s Slimduct SD Straight Duct is available in SD-77, SD-100, and SD-140 variants, giving contractors several channel sizes for different residential and light commercial layouts.
Give the bundle enough room to sit naturally inside the channel. If you have to squeeze the insulation flat just to close the cover, move up a size.
Keep Future Service Work in Mind
A clean-looking cover isn’t much help if a technician has to remove half of it to reach a service valve.
Before mounting anything, locate:
- Refrigerant service valves
- Access panels
- Drain connections
- Wall penetrations
- Equipment covers that need to come off
- Any fitting or connection likely to need future inspection
Near the outdoor unit, leave enough room for normal service work.
Also, take a close look at existing bends. An older installation may not have perfect 90-degree turns. Don’t force a copper line into a fitting just because the fitting looks cleaner. Choose cover components that work with the route already there.
Tools and Materials Checklist
Most residential line set cover installation jobs can be completed with tools contractors already carry.
Before you start, gather:
- Straight cover channels
- Elbows, couplers, wall inlets, reducers, and end fittings as needed
- Compatible pipe straps or retaining hardware
- Tape measure
- Level
- Drill and suitable drill bits
- Screwdriver
- Wall anchors and exterior-rated fasteners
- Hacksaw or suitable PVC cutting tool
- Exterior-grade, UV-resistant silicone where sealing is needed
- Replacement insulation or insulation tape for minor repairs
Follow the hardware instructions supplied with the cover system. For instance, our Slimduct SD installation guidance calls for washer-faced pan-head screws instead of countersunk screws to avoid placing too much pressure on the PVC.
Step-by-Step Installation Process
With the route mapped and tools staged, the assembly follows a clear order. These line set cover installation steps apply to both PVC line set cover systems and metal versions.
Clean and Inspect the Line Set
Start with the piping itself.
Remove dirt, loose material, old adhesive, leaves, or debris that would otherwise be trapped inside the cover. Look closely at the insulation around bends and previous support points, where damage can be easy to miss. Repair torn, split, or badly compressed insulation before moving on.
The U.S. Department of Energy’s mini-split installation guidance also calls for refrigerant lines to remain free of kinks, crimps, and excessive bends. If the existing copper needs more than a minor adjustment, don’t force it into the channel.
Lay Out the Cover Before Drilling
Dry-fit the route against the wall first. Hold the bases and fittings in place and check how the entire run comes together. Mark your cuts, transitions, and fastener locations once you’re happy with the layout.
Pay special attention to corners. A small measurement error at the first fitting can become a much larger alignment problem several feet down the wall.
Cut and Mount the Base
Cut each straight section to length and clean up rough edges. Next, mount the base to the wall using fasteners suited to the surface. Wood siding, brick, masonry, and metal call for different mounting hardware.
Use a level along longer runs. Once the cover is clipped on, crooked sections become easy to see. Follow the manufacturer’s spacing instructions rather than using the same fastener spacing for every product.
Place the Existing Line Set in the Channel
Once the bases are secure, gently position the existing piping inside them. Work along the run, keep the insulation relaxed, and avoid pinching drain tubing against the back of the channel.
The line set should sit inside the cover without being forced. If the cover won’t close comfortably, stop and check the sizing. Compressing thick insulation just to make a smaller channel work can create another problem while solving the appearance issue.
Finish the Run Near the Outdoor Unit
Installing lineset covers after AC unit installation takes a little extra planning near the condenser because the equipment connections are already in place.
Bring the cover close enough to protect the exposed run, but leave normal service areas open. Avoid placing cover components over removable equipment panels or refrigerant service connections.
End fittings can help finish the route without extending the channel farther than needed.
For larger commercial installations, Inaba Denko’s Slimduct PD Commercial Lineset Cover System includes PDC End Fittings made specifically to finish the line set before its connection to the condenser.
Seal Penetrations and Transitions
A line set cover protects what’s inside, but it shouldn’t be treated as a waterproof enclosure by itself. Pay particular attention to the wall penetration and any area where rain can get behind the cover.
Inaba Denko’s Slimduct SD guidance specifically recommends silicone caulking with strong UV resistance where sealing is needed.
Check the top of vertical runs as well. Water entering from above can travel behind an otherwise clean-looking cover.
Material Options: PVC vs. Metal Line Set Covers
PVC and metal can both work well, but they serve somewhat different applications.
A quality PVC line set cover is lightweight, easy to cut, and quick to assemble. It’s a practical choice for residential mini-splits, heat pumps, and many light commercial installations.
Slimduct SD, for example, uses UV-resistant, flame-retardant PVC and has a published operating temperature range of -4°F to 140°F.
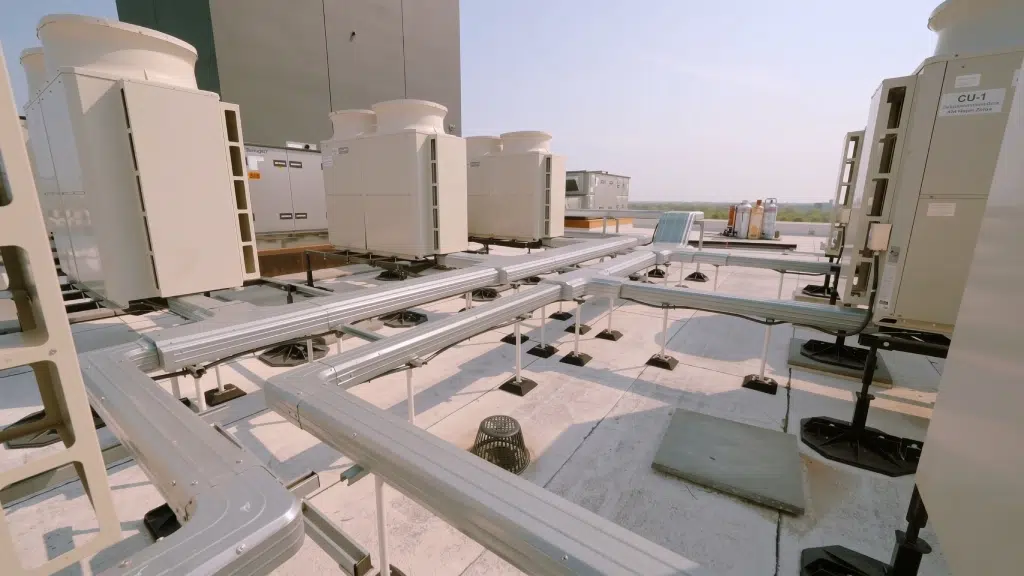
Larger rooftop or VRF/VRV installations may call for metal line set covers instead. Inaba Denko’s Slimduct RD Commercial Lineset Cover is made from galvanized steel with a zinc-aluminum-magnesium coating. It’s designed for VRF and VRV installations where multiple line sets, rooftop exposure, or greater physical protection need to be considered.
There’s also the Slimduct PD Commercial PVC HVAC Lineset Cover, a commercial PVC system made for refrigerant piping, wiring, and drain lines. Since its fittings can be disassembled, it is especially useful on retrofit work where the existing piping is already in place.
| Material | Durability Profile | Cost | Installation Ease | Maintenance |
| PVC | Lightweight with good outdoor performance when UV-stabilized | Lower | Easy to cut and assemble | Check joints, seals, and mounting points |
| Metal | Better suited to demanding exposure and physical contact | Higher | Easy to cut and assemble | Inspect fasteners, joints, and coating |
The better choice depends on the job. A metal cover isn’t automatically the right answer for every exterior run, just as residential PVC isn’t meant for every commercial rooftop.
Protection is also a code consideration in many jurisdictions. For example, IRC R403.4.1 addresses protecting weather-exposed piping insulation from sunlight, moisture, wind, and physical damage. Local code adoption and amendments vary, so check the requirements for the project location.
Case Study: Organizing Multiple Exterior Line Sets
The Easton, Pennsylvania apartment project shows what a well-planned exterior cover layout can look like.
Murray Heating and Contracting replaced a central steam heating system in a seven-unit apartment building with individual heat pumps. The project used Inaba Denko Paircoil line sets and Slimduct SD covers to route refrigerant piping, drainage, and wiring along the exterior.
The project wasn’t simply about hiding pipes. Multiple HVAC runs needed to stay organized across a shared exterior while giving each apartment its own system.
Slimduct SD helped turn those separate runs into a cleaner, more structured installation.
For retrofit cover work, the same lesson applies: plan the entire route before mounting the first piece. A few extra minutes spent looking at how all the sections connect can save a lot of rework later.
Frequently Asked Questions
Can you install line set covers immediately after HVAC installation?
Yes, once commissioning and the required system checks are complete. You don’t need to wait a fixed number of days. Make sure the system is operating properly, the line set has been inspected, and any wet insulation has dried before installing the cover.
Do line set covers affect HVAC performance?
Not when they’re sized and installed correctly.
Problems can occur if a channel compresses the insulation, pinches the drain line, forces the refrigerant tubing into a tight bend, or interferes with service access. Give the existing bundle enough room to sit naturally inside the cover.
What size line set cover do I need?
Measure the complete insulated bundle rather than the copper pipe alone.
Include the refrigerant lines, insulation, drain tubing, and any approved wiring sharing the channel. Then compare the finished bundle with the internal dimensions of the cover and fittings you’re considering.
Can I install a line set cover on an older system?
Yes. Retrofit installation is one of the main advantages of a two-piece line set cover.
Inspect the existing piping first. Repair deteriorated insulation, loose wrapping, damaged drain tubing, or other visible problems before covering them.
Do I need a professional to install line set covers?
Straight residential runs can be relatively simple for someone comfortable with basic tools.
More complicated installations are different. Multi-story runs, rooftop systems, large commercial piping, difficult penetrations, or any work requiring changes to the refrigerant circuit are better left to an HVAC contractor.
Give an Existing HVAC Installation a Cleaner Finish
Adding a line set cover after the HVAC equipment is already running doesn’t require starting over.
The job comes down to careful line set cover sizing and measurement, choosing fittings that match the existing route, leaving enough space around the insulated piping, fastening the system securely, and keeping future service access open.
Once installed, the cover gives exposed refrigerant piping and insulation another layer of protection from sunlight, weather, pests, and physical contact. It also turns an unfinished-looking exterior run into a much cleaner installation.
Like any exposed HVAC component, line set cover maintenance is simple but worth doing. Check fittings, fasteners, seals, and visible damage during routine system service, especially after severe weather or exterior building work.
Inaba Denko offers residential PVC, commercial PVC, and commercial metal cover systems for different line set sizes and installation conditions. Contact Inaba Denko America today to get a quote.
